Pages

Showing posts with label resin. Show all posts

Monday, March 31, 2014

A bit more starlight....

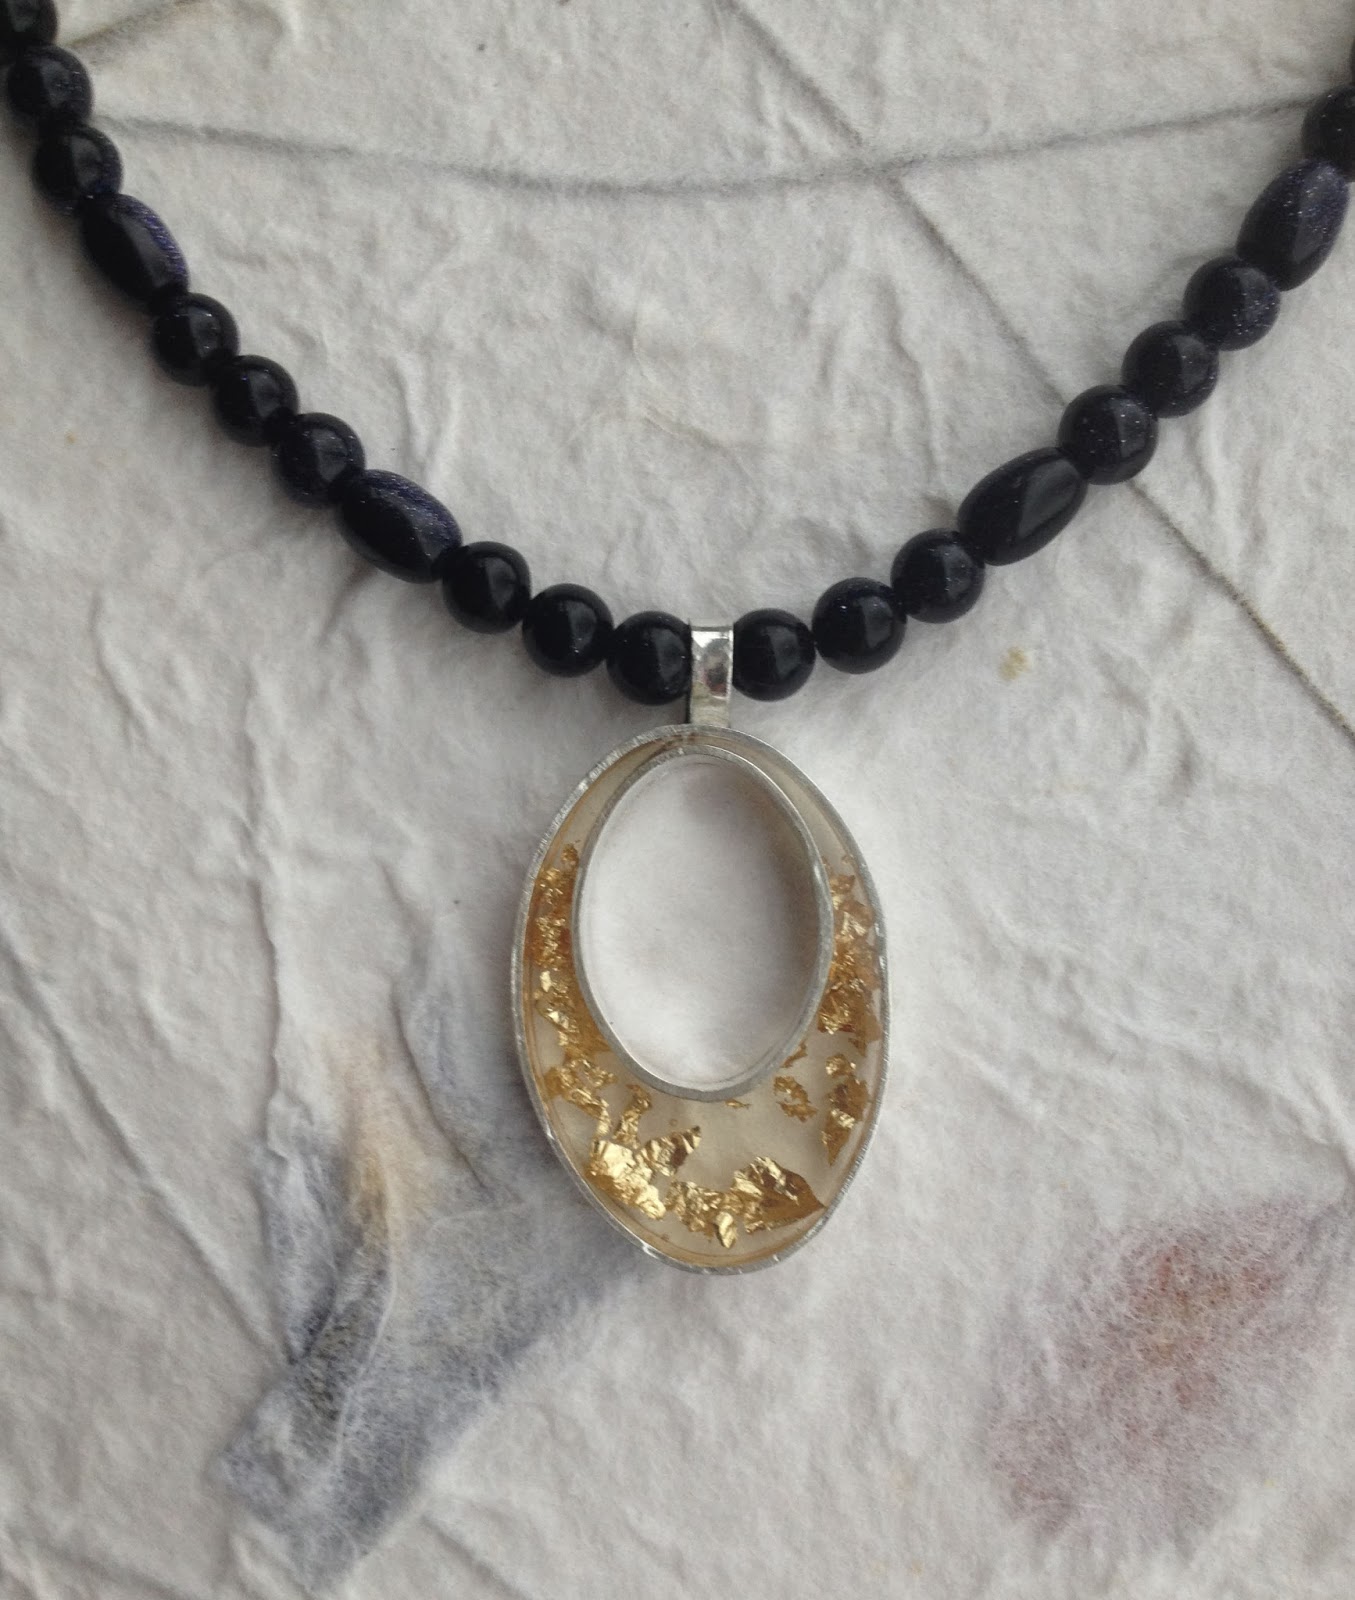
I said that I was going to explore the idea that I started when making a present for my lovely sister-in-law.  With that piece, I sandwiched silver ovals together with resin - leaving the black clear so the light can flood through.  This is a similar idea but I really wanted to get a more geometric look so I've been working on getting more angles into a silver shape.  This is what I came up with......


I used some labradorite wheels to finish off the necklace.  


Monday, March 10, 2014

Crushed Gemstones

I've been playing around with some crushed gemstones and seeing how they work with resin.  For this piece I made a domed silver disc and then filled it with crushed garnet and citrine - using resin to keep everything in place.

I was after a textured finish so I didn't dome over the top with resin - I was really just using it as glue.   I like fiddling with jewellery and I thought the texture would feel good to the touch.  


I finished the necklace off with a string of co-ordinating garnet nuggets.


Wednesday, February 12, 2014

The trouble with men

I find it challenging to decide what to make for men.  For women, I have loads of ideas but with men I'm a bit stumped.  However I'd set myself the challenge of a handmade Christmas so I needed to get thinking.  (Sorry, yes I know it is now February - it has taken me a while to show you these).  

First up, I made some cuff links for my brother.  I really enjoyed the challenge of making these - getting them identical (well almost!) and soldering lots of pieces of wire in close proximity (i.e. making sure I didn't melt things I didn't intend to!).  I've also used resin and mica for some colour and subtle shine.  


My Dad is a keen golfer - I am not!  So I had a search online for some ideas of what to make.  When I started making his present I thought I was making a golf marker.  However when I'd almost finished someone let me know that I'd actually made a divot repairer - who knew?!  I quickly decided to add some wire as a bit more reinforcement.  Fortunately, Dad seemed to know what to do with it!


If you have any ideas about what else I can make the men in my life please let me know.......

Tuesday, February 4, 2014

Starlight necklace

I made this necklace for my lovely sister-in-law for Christmas.


It is made of two silver shapes sandwiched together with resin and gold leaf.  I paired this with some blue sandstone beads for a bit of extra starlight shimmer.


I was pleased with how this came out and think I'll work on this idea some more - I'd like to try some different silver shapes.


Monday, January 20, 2014

Hibernation

I seem to have entered a period of extended hibernation after Christmas!  I've been a bit focussed on matters closer to home.  But I think I'm emerging from hibernation again now though - spotting the first snowdrop in my garden at the weekend definitely perked me up!

I said that I'd show you what I had been making as Christmas presents for my nearest and dearest.  First up, this is what I made for my Mum.....

(Resin, Silver, Agate, Leaves)

This is similar to a necklace I've made before, but I changed it up by using skeleton leaves embedded in the resin rather than mother of pearl.  It is the first time, I've revisited a design and I definitely enjoyed working on perfecting a bit more. 

Tuesday, December 17, 2013

I am still here!

Yes, I am still here - not that my blog shows it.......life has just got rather busy of late.  Not least because I'm busy making Christmas presents so I can't really show you what I've been working on - I promise I'll show you in the New Year.  However I did rustle this up just for myself......

(Rosebuds, Resin, Flourite and Czech glass)

I wanted to try some 3D elements with resin and decided to use these rosebuds.  I've given them a coat or two of resin so they are stronger than they look.  I'm enjoying wearing it and I've had a lot of positive comments so hopefully everyone else does too.  

Friday, October 18, 2013

Experimenting again....

I've been experimenting again - well I am a scientist by training so that is hardly surprising.  I mentioned in the Autumn Design Challenge that I've been trying out some Pebeo paints and mixing those with resin.  The paints are lovely.....completely unpredictable but you get some gorgeous honeycomb-like effects, which develop over an hour or so.  It is fun to watch how the colours mix and interact.  Here are a few examples......


....and here is one made up into a necklace.....


Wednesday, October 2, 2013

Autumn Design Challenge

I was lucky enough to be chosen by Lesley and Caroline for their Autumn Design Challenge - have a look at the goodies that they sent me!

I started up with the Caroline's bird bead.  I wanted to find a perch for it and tried a few things - but I eventually decided on this wooden bead that came as part of a pack from Smitten Beads.  I decided to make some resin components - incorporating skeleton leaves.  Then I pulled out some Czech glass beads that had a frosty, autumnal feeling and put these together with the round beads from Caroline.  It got finished off with some peanut beads......


I've been experimenting with some Pebeo effects paints and mixing those with resin.  You get some interesting honeycomb effects - the end result is entirely unpredictable...it is quite exciting watching this paint dry!!  I picked some complementary paint/resin colours to Lesley's flower pendant - and some extra components for the necklace.  Again it is finished off with some peanut beads (I'm a little obsessed at the moment!)....


I've been making quite a few of these wire 'cocoon' beads lately - I make these on a coiling Gizmo.  So I made a couple more and matched them with Lesley's bracelet focal.....


The last thing I made was a bangle using Caroline's heart bead as a dangle.  I made the bangle in wire and then tightly wound on some sari silk.  I wire wrapped this adding a few seed beads for some extra sparkle.  I think I might make a few more of these - I think they'd be fun to stack up on my wrist......


I really enjoyed working with Caroline and Lesley's art beads.  Please do go and check out their work for yourself.  Lesley is at  http://thegossipinggoddess.blogspot.co.uk/ and Caroline is at http://blueberribeads.co.uk/.  Please also go and have a look at what everyone else made with the beads that they were sent for the challenge....


Caroline Dewison – http://blueberribeads.co.uk


Melissa Trudinger – http://beadrecipes.wordpress.com/


Madeline Bunyan – http://madelinebunyan.com/mlj/


Wednesday, September 18, 2013

Capturing Summer

We're definitely feeling the first blast of Autumn here in the UK.....so to remind me of long, warm days and flower-scented nights, I've captured this rose bud in a sphere of resin.  


I've paired it with some golden rutile quartz beads - I had a rummage through my bead stash and these beads seemed to work the best.


Thursday, August 29, 2013

Nostalgia

When I was little I was a big fan of pressing flowers.  My Dad recently showed me a pressed flower bookmark that I'd made him for Father's Day when I was 7 or 8.  A relative made me the flower press - I still have it - but I'm ashamed to say I've forgotten who it was.  They also made a Fort for my brothers.  

UPDATE!  Ooops it turns out that my Mum designed my flower press and my Dad made it for me.  My Dad's Uncle Albert did indeed make the Fort for my brothers but he made me a doll's house.  It obviously got mixed up in my mind over the years!  Sorry Mum and Dad!!

The Hydrangea bush in my garden is looking great this year so I thought that I'd go back to my old habit of pressing flowers.  Once they were pressed, I encased them in resin and made one into a light, simple necklace.  I think I might try doing this again......


Monday, August 12, 2013

Boot Camp

It is time for Boot Camp again and this time it is all about clasps.  Last time I showed you some coiling work that I'd done with the Coiling Gizmo - and I wondered if I could make a clasp with these coiled components.  The answer is yes!  I've made a series of coiled links, incorporating some glass beads for some added interest.  I've paired this with a resin leaf that I made some time ago - it has been sitting in my 'to be completed' pile for a while now and it is good to find it a home!


Here is a close-up on the clasp since this is what Boot Camp is all about........................


Please go and have a look at what everyone else has been making for boot camp - there is always beautiful  and varied work on show.  

Wednesday, August 7, 2013

Beyond Excited

I am very excited because my work is in this month’s Beads and Beyond – my favourite jewellery-making magazine!! Back in the summer, Beads and Beyond announced on their blog that they were opening up their Designer Challenge to their readers for one month only. In case you don’t know, the Designer Challenge is where they send out the same package of beads to four designers and challenge them to make jewellery with them. I thought I would apply and was thrilled when they chose me. The beads arrived by recorded delivery early in June - as well as a brief on what to write about. The copy date for the magazine to receive my jewellery and text back was the end of June so I was busy getting everything finished. I had a strict word count for my descriptions about how to make the jewellery (120 words) – which was a really fun challenge – I think my first draft was closer to 400 words each so I had to slim my descriptions down rather!


It has been a complete joy working with Beads and Beyond – I am so happy to have been part of the Designer Challenge. Please go and buy the magazine to see what I made – it is the September 2013 edition which will be available in the shops on the 8th August..........I'm on page 68!

Tuesday, July 16, 2013

Shimmering leaves


I made the silver leaf and branch with silver and then filled them with resin and mother of pearl.  I wasn’t sure how this would work – I thought the mother of pearl might be too subtle up against the neckline.  However, I really like the effect – it really shimmers when it catches the light.  I was so pleased with it that I decided to make a matching clasp.  To finish it off, I found a mixed quartz strand and the colours worked perfectly.  

Tuesday, June 25, 2013

Quail's egg necklace

I really liked how my previous quail's egg necklace had come out so I decided to strengthen another quail's egg with resin and see if I could set it in silver.....and I could!........

(Sterling Silver, resin, quail's egg)

I kept the setting simple because I just wanted to see how it would work - I may try again and make something more elaborate.  I do like to have something to fiddle with and eggs have such a pleasing shape and texture - I'm loving having one around my neck to play with while I'm mulling something over!  


In unrelated news, Barbara has written a post about her favourite pieces from this month's Love My Art Jewelry Boot Camp.....and I got a mention!  Thanks Barbara!!

Wednesday, May 29, 2013

The ‘What came first’ Necklace

I spotted some quail’s eggs in the supermarket.  They did make a nice little snack but really I bought them because they were so pretty and I wanted to see if I could use them in jewellery. 


I have strengthened the egg with resin so it is a lot stronger than it looks but I do like the apparent fragility of the necklace.  I have some dyed howlite bird beads and these seemed a good match so I’ve included one of these in the necklace together with some seed beads. 


What came first; the quail or the egg?  

Tuesday, April 30, 2013

Art Bead Scene April Challenge

A couple of weeks ago I showed you my interpretation of Monet's "Walk in the Meadows at Argenteuil" which was the work of art chosen for Art Bead Scene's April Challenge.  Art Bead Scene has a blog tour at the end of the month so we can all see what everyone has been making.  Please go and have a look - there are some breathtakingly gorgeous interpretations of the painting.  

Here is my necklace again in case you missed it.....


Saturday, April 27, 2013

Bead Soup

Hooray, it is my reveal day for Bead Soup.  Jò sent me a lovely selection of goodies to work with.  There are some more detailed photos in my earlier blog entry but here is quick recap.....


I started by taking a few of the smaller elements from my soup ingredients and making them into a focal.

There were two bead caps that reminded me of the centre of flowers so I took some of the resin fragments that I blogged about a few weeks ago and made a daisy with the bead cap at the centre.  I paired this with the mother of pearl beads from my Bead Soup ingredients and some seed beads from my stash….


Next I took the leaf and branch charm and filled this with resin and tissue paper. I’ve paired this with some seed beads from my stash and some of the frosted glass beads and another leaf charm that Jò sent.....


Jò told me that she didn’t like working with the colour orange – and fortunately, the bead soup that I sent her didn’t have any orange in it.  To be honest, when I looked in my stash I couldn't find many orange beads either  so I guess I have the same issue with orange as Jò.  Therefore I thought, as one of the aims of Bead Soup is to expand your horizons, I should take it as a challenge to make something with orange beads.  I’ve made this bracelet with the few orange beads I found in my stash (and some creamy brown leaf beads to calm it down a bit!).  From my Bead Soup ingredients, I used some of the bead caps, a leaf charm and the small frosted orange beads that Jò sent….


I’ve had it in my mind for a while to make some resin pieces with some 3D elements.  
Jò included some teeny-tiny bead caps and these gave me the perfect opportunity to try this idea out.  I embedded the bead caps in some of the resin and skeleton leaf components that I blogged about a couple of weeks ago.  I added some coloured resin in the centre to make a centre for the flower.....


and here is the completed piece……


Next I worked with the copper fold-formed focal that Jò sent me as a gift (as if her Bead Soup wasn't generous enough!!).  I made a macrame bracelet for this with some of the glass and silver beads from my soup ingredients....  


And last but not least – how did I use the focal and clasp from my soup ingredients?  I recently did a waxed linen cord knotting class with the very talented Rebecca Anderson over at the Manchester Bead Shop and I wanted to use what I’d learnt in that class.  I went all-in with this one and made a full-on girly confection!!  I paired glass beads from my stash, with the focal, clasp and silver beads from my soup ingredients....    


It has been really fun working with everything that Jò sent.  I was very lucky to be partnered with her!  I really enjoyed the challenge of using ingredients that I hadn’t worked with before.  Please head over to ’s blog to see what she made with the ingredients that I sent her.  And please also go and see what the other bead soup participants made – there is some lovely work out there. 

A final word to Lori Anderson – the hostess of the Bead Soup Blog Party.  I am amazed at the work that she puts into this.  Thanks very much Lori – I’ve really enjoyed your party!!  

Friday, April 19, 2013

Art Bead Scene Monthly Challenge

I'm a big fan of the Art Bead Scene Blog - lots of lovely beads and the work of talented designers, what is not to like!  Every month they have a monthly challenge where a work of art is chosen as inspiration to create or use art beads.    I've been meaning to join in for a while but with one thing and another I haven't quite managed it but when I saw this months painting I knew exactly what I wanted to make.  The picture is Monet's "Walk in the Meadows at Argenteuil".  


I've always loved this picture and what caught my eye for this challenge was the meadow in the foreground.   I wanted to make a focal with strips of different colours of resin which emulated Monet's meadow.  


I had a lot of fun mixing up pigments to make colours for the resin that I thought suggested those in the painting.  What I wanted to do was to create different sections of resin in the focal so I cut copper strips to separate the resin colours.  I also decided to make some connectors using the same colours of resin, but I let the resin flow more organically in these.  I used three of these connectors in the necklace and one as the clasp.  I finished the necklace off with some peanut beads.

The focal is an abstract take on the painting, nothing like Monet's impressionistic style - I hope he won't mind!  


Just to let you know that my reveal date for the Bead Soup Blog party has changed.  It will now be on the 27th April - please come back then.  In the mean time - why not go and have a look at what everybody in the second reveal made - there is some lovely work out there.  

Monday, April 8, 2013

Art Jewellery Boot Camp

The second Boot Camp is all about texturing metal using things that you find around the house.  To be honest I nearly gave Boot Camp a miss this time.  Ordinarily, I go to a metal-working studio - the studio is very well equipped so I haven't needed to get many tools at home.  However, I've torn all the ligaments in my ankle (ouch!) and driving (and walking!) are pretty much out at the moment.  I haven't made it to the studio for a while - I'm missing it!!  When Boot Camp came around, I thought how can I do a metal-working challenge without all the tools I normally use?  But I'd had a lot of fun with the last Boot Camp and didn't want to miss out - so I decided that not only would I use household materials to texture metal, I would see what tools and materials I could find in my house too. 

I dug around in my household tool box and pulled out the heavy-duty hammer and a couple of copper washers.  Now to find something to texture with.  The answer came as I was mulling over a work problem in front of the laptop.  I always fiddle with things when I do this and this time I picked up a paper clip.  Eureka moment!  I hammered the paper clip in a random pattern onto the washers.  I cheated slightly on my self-imposed challenge of using only things I could find in the house and bought some Liver of Sulphur online to emphasise the paper clip texture.  I do all my resin work at home so I had those supplies.  I filled the centre of the washers with tissue paper and resin.  This added some colour but because it is tissue paper it remains somewhat translucent and the light still shines through.  Finally, I made some very basic ear wires and called them done. 


The paper clip held up surprisingly well to being battered with a hammer - though its days of clipping paper are definitely over!  I'd pulled out several clips expecting to have to use a few to get the job done.  But I used the same clip for both washers. 

So there you have it - a very simple design but the best I could do in the circumstances.  I suspect I'm going to be embarrassed by its simplicity when I see the intricate work that others have done!  Please take a look at what everyone has been working on.  I'm pleased with what I could achieve using things from around my house - but I'm still going to be scurrying back to the metal-working tools at the earliest opportunity!

Tuesday, April 2, 2013

Falling Leaves Necklace

I hope that you had a good Easter.  

Over Easter, I pulled out the resin and made a few more of the resin fragments.  This time I used skeleton leaves rather than paper.  I made quite a few (I think I'm getting a bit obsessed!).  I've paired these with some Czech glass and peanut beads.  I like how this came out, super-light but with impact.  


Over Easter, I also spent a lot of time looking at the first reveal of Bead Soup.  I definitely recommend having a look, there is some lovely work out there.  There are so many of us participating that Lori has split us up into three groups.  I'm in the third reveal, please come back and see what I've made out of my soup ingredients on the 20th April*.

*Please note: my reveal date for Bead Soup has been postponed slightly (it was the 13th and is now the 20th).  Poor Lori, who organises Bead Soup, hasn't been well recently and needs a bit of extra time to deal with the mammoth task of organising the Bead Soup Blog Party.  Get well soon Lori!